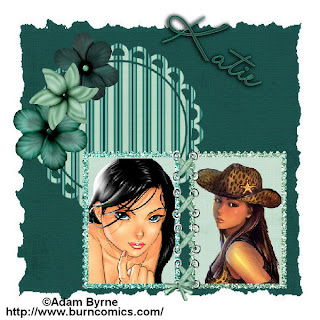
This tutorial is copyrighted by Designs by Katie, any similarities to another tutorial is purely consequential. If you have any questions please ask.
Two tubes I am using the beautiful artwork of ©Adam Byrne.
Scrap kit of choice I am using the kit Acqua by Bel Vidotti
Mask Becky_mask001.jpg included in supplies
Mask image 0011 included in supplies
Font of choice I am using LainieDaySH
Supplies
Paint Shop Pro
If you wish to have a written copy of this tutorial you may get it here
Put the masks in your mask folder in Paint shop pro.
Open two tubes you wish to use minimize them for now. Open three papers, 3 flowers, a vine, a lace up, and two frames you wish to use and minimize them all. Open a new image 600 x 600 pixel 72.000 resolution.
Two
Copy one of the three papers and paste into your image. Use Becky_mask001.jpg with the following settings.
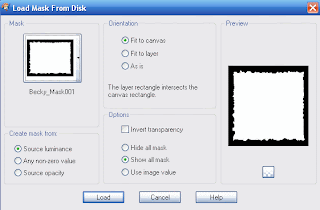
Merge Group.
Three
Copy another paper, and paste it into your image. Use mask image0011 with these settings.
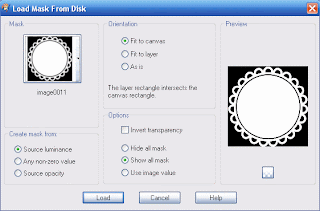
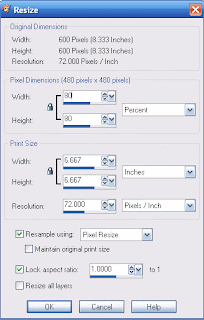
Merge group. Resize with these settings.
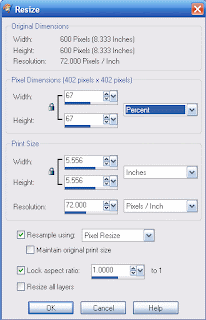
Resize again with these settings.
Move to the upper corner as shown in the image below.
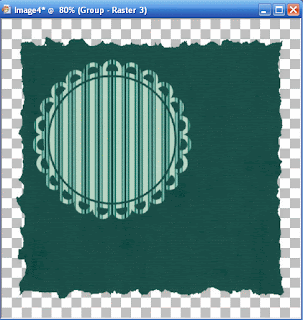
Four
Open one of the frames copy and paste into your image. Resize by 80 percent x 2 (you may have to tweak it too look like the below image) percent. Open the other frame copy and paste resize by 80 percent x2. It should look like this.
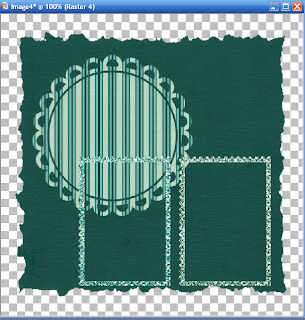
Five
Open up the laces tube that you have chosen. Resize it down to about right to fit over the frames. If you need to use the raster deform. It should look like this.
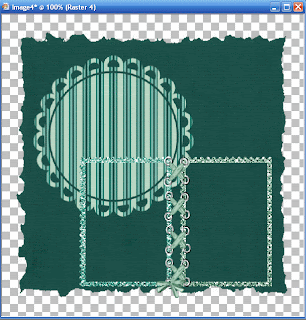
Six
Click in your menu Layers/Merge down the frames and lace ups. Maximize paper three, open your image add layers/new raster layer with the inside of the frames selected, selections/modify/selection/expand by 7 paste into selection, selection/select none. Move this raster layer below the frames layer. Close out of the paper you opened. It should look like this now.
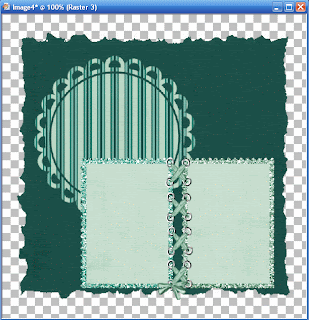
Seven
Open the flowers copy them and then paste into your image. Resize the flower by 35 percent and move it to the top of the circle. Copy the second flower and then paste into your image. Resize flower by 35 percent and move on top of the other flower. Copy the third flower and then paste into your image. Resize the flower by 35 percent and move on top of the other flowers. It should now look like this.
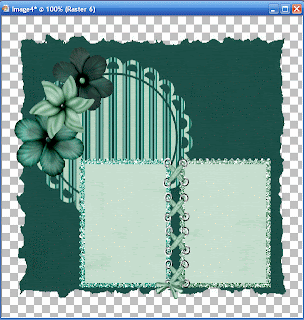
Eight
Open one of the tubes you have chosen, copy then paste into your image move it below your frame layer. Resize (I used 80 percent 2x) till the head of the girl is in the frame. Select the frame layer click the wand and click inside both sides of the frame, selctions modify and expand by 3. Select your tube layer and invert selection hit delete. It should now look like this.
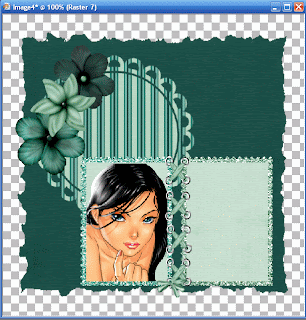
Nine
Open your other tube. Copy then paste into your image, resize the same way as in Step 8, Select the frame layer, select the inside of the other frame, selections modify expand by 3, invert. Select the tube layer hit delete. It should look like this.
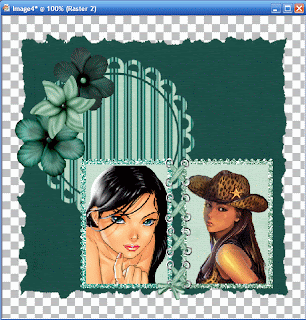
Maximize the vine, copy and paste into your image. Resize the vine to fit over your frame (if you want you may leave off the vine.)It should look like this if you used the vine.
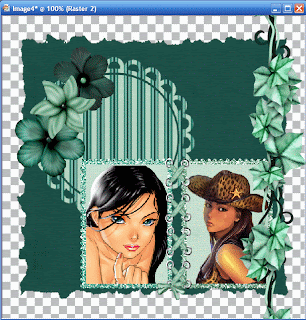
Put your copyright information if you have it. Flatten image. Click the eyedropper and pick a light and dark color from you scrap kit. Click the text tool and pick your font that you want to use (again I used LainieDaySH). Add your text. Save image as .Jpg.
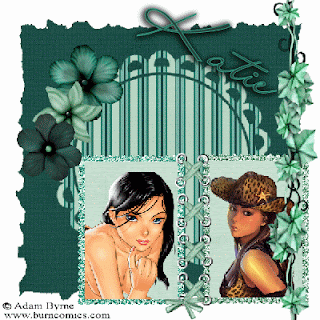
Hope you enjoyed this tutorial.
Hugs,
Katie


1 comment:
Hello katie, thanks for using my kit for your tutorial, loved the tag!
I put a link for your tut in my blog!!!
kisses
Post a Comment