
Materials:
Paint Shop Pro
My newest scrap-kit Girls Rock Tagger Sized
A tube of your choice
My supplies include a tube, and the two masks
Supplies
Step One
Open your tube, two papers, a frame, one of the be-ribboned buckles, put the masks into your masks folder of psp, a bow, and a beaded word art I have put 2 in the kit one has words on it the other doesn’t.
Open a new image 600 x 600.
Maximize one of your papers, edit/copy, go to your new image edit/paste as new layer. Close out of your paper.
Layers/load\save mask find the mask dsbk_funkyflower and use these settings:
Fit to layer, source luminance, and show all mask
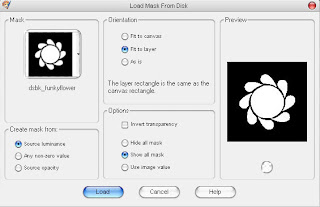
(optional you may add a drop shadow to this layer.)
Layers/merge/Merge group
Image/resize 110 percent 2 times.
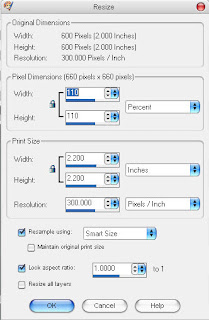
Maximize your other paper, edit copy, and go to your new image edit/paste as new layer. Close out of your paper. Layers / load\save mask find the mask dsbk_pinkedcircle and use these settings:
Fit to layer, source luminance, show all mask, and invert transparency checked.
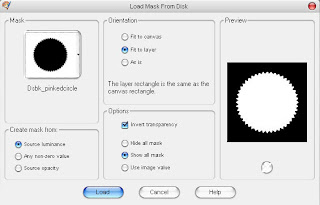
Layers/merge/Merge group
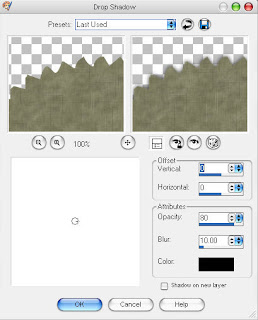
Effects/3d Effects/ Drop shadow with these settings:
0,0,80,10, black
Step Two
Maximize your tube. Edit/ copy, go to your image edit/ paste as new layer. Close out of your tube.
Now if your tube is a little big you might need to resize it if so do it in 80 percent increments.
Maximize your frame tube. Edit/copy, go to your image edit/paste as new layer. Close out of your frame.
Now click the mover tool, and move your tube to a position you like inside the frame.
It should look similar to this:
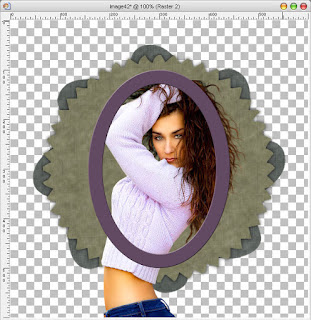
Now go back to your frame layer click the magic wand tool and select the inside of the frame.
Selections/Modify/Expand by 2.
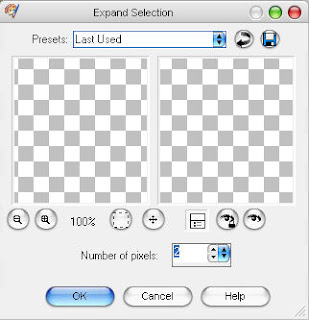
Selections/Invert.
Now go down to your tube layer and hit the delete key one time.
Your image should now look similar to this:
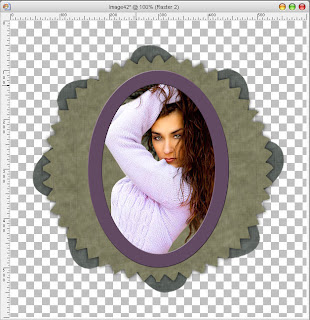
Click your frame layer Layers/Merge/Merge down.
Selections/Select None
Step Three
Maximize your bow tube. Edit/copy, go back to your image edit/paste as new layer. Close out your bow tube.
Image/resize with these settings:
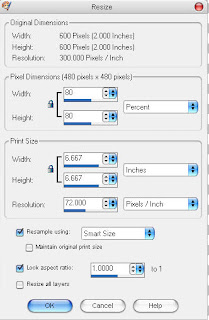
80 percent, 80 percent.
Click the mover tool. Move your bow to the top of your frame.
Effects/3d Effects/Drop shadow with these settings:
0,0,80,10, black

It should now look similar to this:
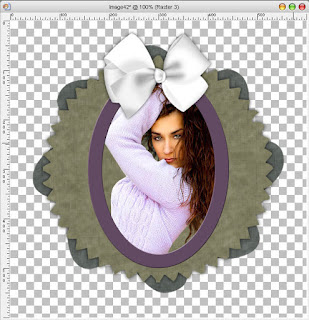
Screenshot9
Maximize your ribboned buckle. Edit/copy go to your image edit/paste as new layer. Click the mover tool and move your buckle tube across your image into a position that looks good to you.
Maximize your beaded word art. Edit/copy go to your image edit/paste as new layer.
In your layer pallet move this layer below your bow layer.
Resize your beaded word art with these settings:

Two times.
Now click your mover tool. And move it below the bow till it looks good to you.
Image/rotate/free rotate with these settings:
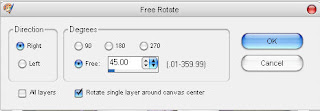
If you choose the beaded word art with words on it skip this step if not continue on.
Click your text tool choose your size and font. Now type what you would like your word art to say.
Image/rotate/free rotate.
Keep the same settings just change the direction from right to left.
In the layer pallet right click on this layer, Convert to raster layer. If it doesn’t fit over your beaded word art you will need to resize it.
Now click the mover tool and move over your beaded word art.
(Optional: You may add drop shadows to the beaded word art and beribboned buckle if you so wish.)
Layers/Merge/Merge down.
Step Four
Add your watermark/copyright information.
Click the text tool add your name or names.
Layers/Merge/Merge All Flatten.
Save as .jpg.
I hope you enjoyed this tutorial as much as I enjoyed creating it.


1 comment:
Thank you! Your blog post will be advertised on the DigiFree Digital Scrapbooking Freebie search engine today (look for timestamp: 10 Aug [LA 12:00am, NY 02:00am, UK 07:00am, OZ 05:00pm] ).
Post a Comment